An Airstream trailer only has a few moving parts, so taking it to the dealer for an old-fashioned “lube job” isn’t normally part of the program. But occasionally things squeak, grind, or stick, and that can make the whole trailer seem old long before its time.
Note: Reposted with permission from our friends at AIR GEAR
Fortunately, it’s an easy fix—and easy to prevent. Other than wheel bearings, you can easily take care of all the common lubrication points by yourself, with no tools other than a rag, and no special skills. (You can do the wheel bearings yourself, too, but you’ll need a few tools and a willingness to get greasy; the procedure is documented in my book, “The (Nearly) Complete Guide to Airstream Maintenance”.)
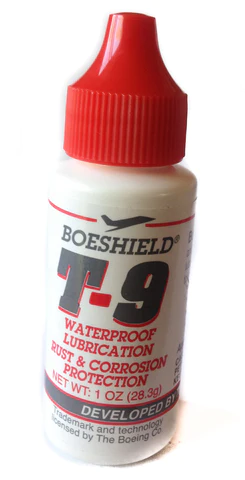
You also don’t need to stock up on a lot of fancy lubricants. Most simple jobs can be done with common silicone spray, which is available in any hardware or auto parts store. We use and recommend Boeshield T-9, because it quickly dries to a waxy, waterproof finish that inhibits corrosion and lasts longer. It also doesn’t capture dirt like grease does. (We include Boeshield T-9 with our Maintenance Essentials Kit.)
If you are going to use silicone spray, wear grungy clothes and consider wearing gloves too. It’s a little messy, and the smell tends to linger even after you wash off your hands.
Let’s look at nine typical lubrication points that can be found on most Airstream travel trailers. Several of these also apply to the Nest, Basecamp, Interstate, and Atlas. If you prefer, you can watch our video on the subject.
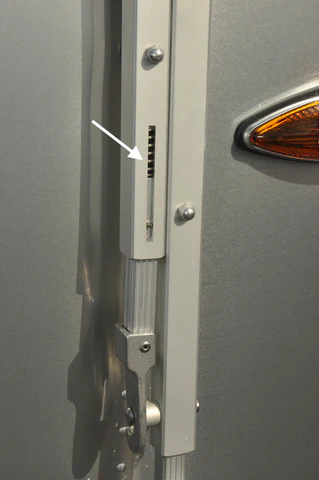
1: Awning arms and rollers. Start with the aluminum arms and telescoping tubes that hold up your Zip Dee awning, whether manual or powered. Zip Dee recommends wiping them clean (use soap and water for stubborn dirt) and then spraying the telescoping arms and tubes with silicone. For a manual awning, don’t forget to spray the springs near the claws at the end of the upper rafters (see arrow in left photo).
If you have a power awning, don’t use silicone spray on the two small holes in the support arms. Put a little white lithium grease in those.
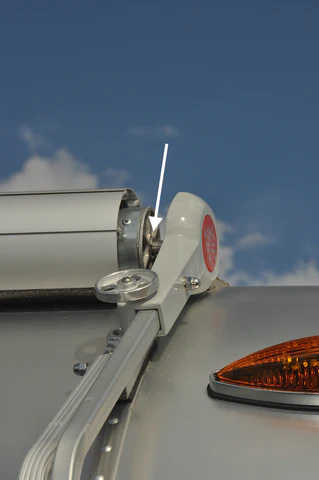
If your manual awning squeaks as you unroll it, spray the ends of the rollers (pictured above), or drip a little Boeshield T-9 at that point. The awning should be quiet as you deploy it.
2: Stabilizer jacks. The four stabilizer jacks under the trailer tend to get noisy over time. In fact, they can eventually develop a loud squealing noise when you put them down or take them up, which can make you quite unpopular at the campground. They may also squeak as you move around the interior of the trailer.
A quick shot of silicone will cure this, but the trick is knowing exactly where to aim. Often the squeak point is at the innermost end of the jack, where it is fastened to the underbelly of the trailer. Spray in this area and run the jack up and down a couple of times to confirm that the noise is gone. If it still squeaks you can try a few other locations on the jack (you can’t add too much silicone spray here) and have an assistant run the jack up and down as you work, to help distribute the lube. Just be sure not to lie directly under that point when you spray it, or you’ll get a face-full of silicone dripping down on you.
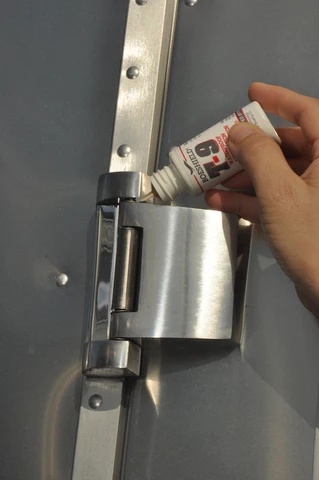
3: Door hinges. Your Airstream door should not sound like the entrance of a haunted mansion. But don’t use silicone here; it tends to make a messy black streak (the result of silicone and aluminum oxide mixing) that you’ll find after your first tow or rainstorm.
Instead, a few drops of Boeshield T-9 lubricates more cleanly. Apply it to the top of each hinge and work the door back and forth a few times to make sure the lubricant has dripped down the length of the hinge pin. Use a rag or paper towel to wipe up any excess that drips out.
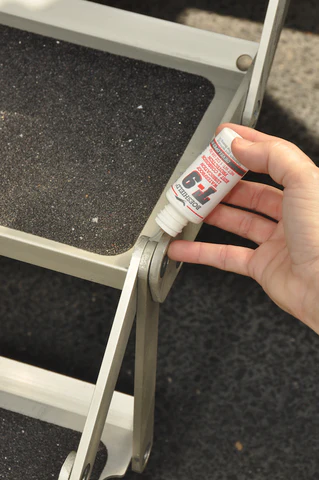
4: Folding entry step. The entry step doesn’t usually need much help, but if it’s making noise, generating black dust (on an aluminum step), or hard to move, it’s time to lube it up. Silicone or Boeshield can be used on the hinge points. Work the hinge a few times the way you did with the entry door.
5: Locks. There seems to be a fair bit of debate about the proper way to lubricate a lock. Some people swear by light machine oil, others like silicone, some use “graphited” oil, and others use only powdered graphite. To make it more confusing, there are just as many “authorities” who say to never use any of those products.
Don’t stress over it; almost any lubrication is better than what most locks get, which is nothing at all. If a lock is getting sticky or fussy, just put a small amount of your lube of choice in the keyhole, or lubricate the key itself and work it in and out of the lock several times. In this case, more is not better, so start with less than you think you need and only add more lubricant if the lock is still sticky.
Remember, locks can rust just like any other steel product, so it’s good preventative maintenance to lubricate the locks even before they start to get difficult to turn.
6: Window and vent seals. The black rubber seals around Airstream windows and Fan-Tastic Vents tend to stick shut if they aren’t maintained. You may have noticed little decals under the windows warning you not to force them open from the inside if they stick shut—that’s because you can break the glass if the seal is really stuck.
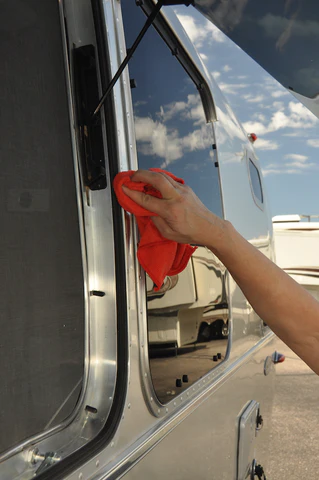
Fortunately, all the seals need is a quick wipe-down with a rag and some silicone spray, and then they won’t stick. Don’t spray directly on the seal, or you’ll have to clean up overspray afterward. Open the window or vent fully, wet a paper towel or clean rag with the silicone, and wipe the seal with that.
Let the silicone dry on the seal for a minute or two, to minimize mess on the glass, before you shut the window.
7: Window latches. If you have standard Airstream windows with two chrome latches (like the one pictured at left, not the Hehr windows that use a round black knob to open), it’s a good idea to lube the latches once in a long while. Just a drop or two of Boeshield where the latch rubs will make them operate smoothly.
8: Hitch coupler latch. This is probably the most overlooked lube point on any trailer. Failing to show the coupler latch a little love once in a while will result in a rusty and difficult latch. A little paint scrapes off the latch every time you use it, leaving bare metal that will rust, so lubricating it with Boeshield is good insurance. Just a few drops on the sliding parts will do the job here.
9: Coupler ball. Technically, the ball isn’t part of your Airstream, but I’m including it here because it’s important. If you don’t lube it, the chrome finish of the ball will wear off (a process called “spalling”) and it will begin to make some really awful squealing noises as you tow.
Put a coat of good-old-fashioned grease on the ball so it will last longer. You can just smear it on with a paper towel or put on a pair of disposable gloves and apply the grease with your fingers. You can also put grease inside the coupler, from beneath.
Ordinary grease or white lithium grease will do; you don’t need to spend more for something exotic. If you have ruined a few pairs of pants by accidentally brushing up against the greasy tow ball, try putting a plastic grocery bag over it when you’re not using it.
If you use a Hensley Arrow or ProPride 3P hitch, the coupler ball rarely sees the light of day. But it still needs lubrication. Make a point of unhitching the ball at least once a year to load up the ball and coupler with grease.
Doing all the lubrication points listed here will take you only about 30 minutes the first time, and probably half that the second time you do it. So the investment is small, and the rewards—blissful silence, an Airstream that feels new again, and longer-lasting components—are big.

